Contrary to popular belief, foam panels and blackout curtains are not effective solutions for blocking street noise; true soundproofing relies on adding mass and sealing air leaks.
- Airborne noise from traffic travels through the smallest gaps, rendering even double-glazed windows ineffective if vents or seals are compromised.
- Effective noise blocking requires dense materials (Mass-Loaded Vinyl) to stop sound waves, while soft materials (foam, rugs) only absorb echo within the room.
Recommendation: Begin by conducting an “acoustic triage” to identify and seal all air gaps around windows, doors, and vents before investing in any soundproofing products.
The constant hum of traffic, the wail of a distant siren, the rumble of a passing bus—for urban dwellers, these sounds are the relentless soundtrack of daily life. You’ve invested in double-glazed windows and maybe even some “soundproof” curtains, yet the noise persists, seeping into your sanctuary and fraying your nerves. The common advice to simply add more soft furnishings, like rugs and throw pillows, often leads to disappointment. While these items can make a room feel cozier, they do little to combat the low-frequency drone of the city outside.
The frustration is understandable. Most online guides confuse sound absorption (reducing echo inside a room) with sound blocking (preventing noise from entering). This fundamental misunderstanding leads renters and homeowners to waste money on solutions, like acoustic foam panels, that are designed for recording studios, not for silencing a busy street. As environmental health research shows that exposure above 70 dB(A) can increase stress and blood pressure, finding a real solution is not a luxury, but a necessity for well-being.
But what if the key wasn’t just adding materials, but strategically thinking like an acoustic consultant? This guide moves beyond the platitudes to focus on the physics of sound. We will explore how to diagnose your apartment’s specific weak points and apply targeted, non-destructive solutions. You will learn to manage the true enemies of silence—air gaps, structural vibrations, and sound reflections—using principles of mass, decoupling, and absorption correctly. This is your blueprint for reclaiming your peace and quiet, without risking your security deposit.
This article provides a structured approach to identifying and solving your apartment’s specific noise problems. The following sections break down the core principles and provide actionable, renter-friendly strategies for a quieter home.
Summary: A Renter’s Guide to Quieting Urban Noise
- Why do you still hear the bus outside even with double-glazed windows (air vents explained)?
- How to position foam panels to stop echo vs stopping noise entering (they are different)?
- Heavy Curtains vs. Cellular Shades: Which window treatment actually blocks traffic noise?
- The structural reality: Why you can’t stop your neighbor’s footsteps with just a rug
- The construction glue mistake that ruins your deposit when removing acoustic foam
- Smartphone or dedicated recorder: Which device ensures audio clarity for 50 years?
- How to separate work and sleep zones in a studio without building walls?
- How to Arrange a 400 Sq Ft Apartment to Reduce Daily Stress Levels?
Why do you still hear the bus outside even with double-glazed windows (air vents explained)?
It’s a common and deeply frustrating scenario: you’ve spent a significant amount on high-quality, double-glazed windows, yet the low-frequency rumble of the morning bus still wakes you up. The culprit is almost always an unaddressed air gap. Sound, especially airborne noise from traffic, behaves like water; it will find and exploit any path of least resistance. A high-performance window is only as good as its seal, and the most common points of failure are ventilation systems and worn weather stripping.
Think of your apartment as a boat. A tiny hole can sink the entire vessel, and a small air vent can compromise your entire soundproofing investment. In fact, standard residential construction provides approximately 15 dBA of exterior-to-interior noise reduction with windows partially open for ventilation. Closing them might increase that to 20-25 dBA, but a mandatory, unsealed air vent effectively leaves that window “open” from an acoustic standpoint. The first step in any soundproofing project is not to add material, but to conduct an acoustic triage to hunt down and seal these leaks.
Your Action Plan: Diagnosing Noise Leaks
- Contact Points: Methodically list every potential channel where outside noise can enter. This includes windows, doors, HVAC vents, electrical outlets on shared walls, and even recessed lighting fixtures.
- Data Collection: Use a smartphone decibel meter app to take relative readings. Measure the noise level directly at each contact point during peak traffic hours to inventory your weakest spots.
- Consistency Check: Correlate your findings with your daily experience. Is the high-pitched siren noise coming from the window seal, while the low-frequency bus rumble seems to come through the vent? This helps you match the problem to the solution.
- Weakness Analysis: Based on your data and observations, identify the top two “leakiest” points. Focusing your budget and effort here will yield the most noticeable improvement, rather than spreading resources thinly.
- Integration Plan: Create a prioritized action plan. Start with the easiest and cheapest fix (e.g., applying new weatherstripping tape) before moving to a larger investment (e.g., a mass-loaded curtain for the weakest window).
Before you can block sound, you must first create a sealed container. This meticulous diagnostic phase is the most critical part of the process and the foundation upon which all other techniques are built.
How to position foam panels to stop echo vs stopping noise entering (they are different)?
One of the most pervasive myths in DIY soundproofing is that sticking foam panels to your wall will block outside noise. This is fundamentally incorrect. Acoustic foam is designed for absorption, not blocking. Its porous, open-cell structure is excellent at trapping sound waves already *inside* a room, which reduces echo (reverberation) and clarifies speech. However, it lacks the sheer mass required to stop powerful, low-frequency sound waves from traffic from entering your space in the first place.
To stop noise from entering, you need mass and density. To stop echo, you need absorption and diffusion. Placing foam on a wall facing the street will do virtually nothing to quiet a passing truck. The correct application for absorption panels is on the “first reflection points” inside your room—the spots on walls where sound from your speakers or your voice would bounce directly to your ears. This is crucial for home offices or living rooms where call clarity or audio quality is important. The goal is to create an acoustically pleasant internal environment, not to build a fortress against the outside world.

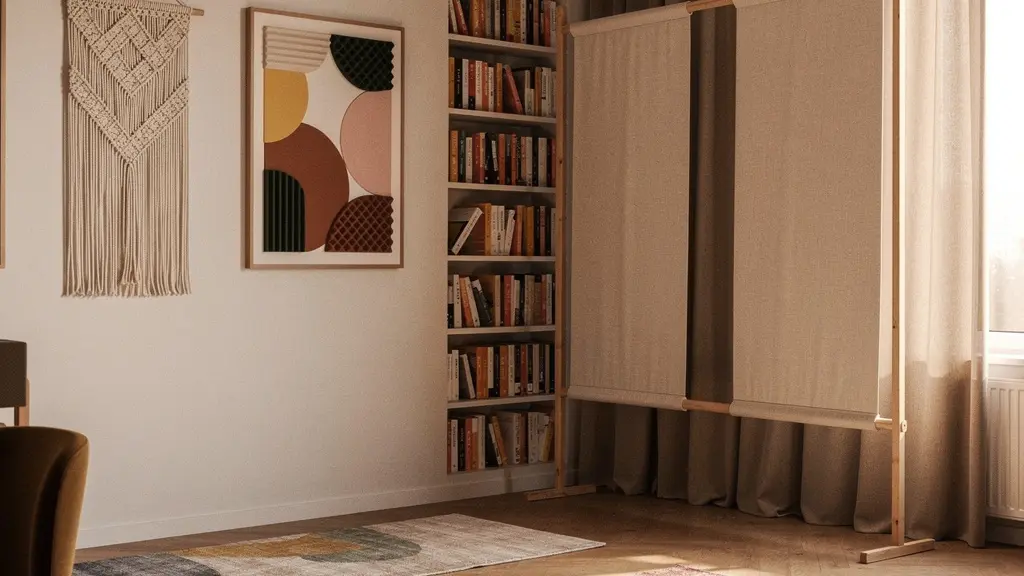
Instead of unsightly black foam, you can achieve superior echo control with elements that enhance your decor. Think of thick macramé wall hangings, a gallery wall of fabric-wrapped canvases, or even a well-stocked, asymmetrical bookshelf. These items act as both absorbers and diffusers, scattering sound waves to prevent harsh reflections while adding visual interest.
Case Study: The Brooklyn Video Studio
Galaxy Visuals, a video studio in Brooklyn, had an acoustically unusable space where echoes made speech unintelligible. Instead of covering the walls in foam, they distinguished between echo control and noise blocking. They used diffusion elements like asymmetric bookshelves and sculptural room dividers to manage internal reflections. For noise blocking, they focused mass-loaded materials only at key entry points. By embracing this dual strategy with high-design elements like textile art, they achieved a professional-grade recording environment without a single visible foam panel.
The key takeaway is to use the right tool for the job. If your problem is a noisy street, focus on adding mass at the window. If your problem is a harsh, echoey home office, strategically place absorptive and decorative elements on your walls.
Heavy Curtains vs. Cellular Shades: Which window treatment actually blocks traffic noise?
The window is often the weakest link in an apartment’s acoustic defense. While many products claim to reduce noise, their effectiveness varies dramatically and depends on a single principle: mass. To block sound waves, you need a barrier that is both heavy and dense. Lightweight solutions may offer marginal benefits, but they cannot stop the persistent, low-frequency noise from heavy traffic.
Standard blackout curtains, while great for light control, offer minimal acoustic benefit. Their primary function is not based on mass. Cellular shades, also known as honeycomb shades, are slightly better. Their design traps a layer of air, which provides a small amount of insulation against thermal transfer and mid-to-high frequency sound. However, they lack the density to significantly impact traffic rumble. The most effective, non-permanent solution is a true acoustic curtain. These are made from extremely heavy, densely woven fabrics or, for maximum performance, are lined with Mass-Loaded Vinyl (MLV). MLV is a thin, flexible, yet incredibly dense material specifically engineered for sound blocking. As laboratory testing demonstrates, MLV curtains can achieve an STC rating of 26-27, which is comparable to adding an entire layer of drywall.
The following table, based on data from a comparative analysis of window treatments, breaks down the options.
| Treatment Type | STC Rating | Noise Reduction | Best For | Cost Range |
|---|---|---|---|---|
| Heavy Acoustic Curtains | 21-25 | Absorbs mid-high frequencies | Bedrooms, rentals | $50-200/window |
| Cellular Shades | Not rated alone | Traps air in pockets | Offices, moderate noise | $100-300/window |
| MLV-Lined Curtains | 26-27 | Blocks low frequencies | High traffic areas | $200-400/window |
| Window Inserts + Curtains | 40+ | Maximum reduction | Airport/highway noise | $300-600/window |
| Standard Blackout Curtains | Not rated | Minimal (5-10%) | Light control mainly | $30-100/window |
For renters dealing with significant street noise, an MLV-lined curtain is the most impactful investment. It provides the necessary mass to form an effective barrier, transforming a noisy bedroom into a quiet retreat. For the best results, ensure the curtain rod extends well beyond the window frame and the curtain reaches the floor to create a comprehensive seal.
The structural reality: Why you can’t stop your neighbor’s footsteps with just a rug
If you’re plagued by the sound of your upstairs neighbor’s footsteps, you’re dealing with impact noise, and it’s a completely different beast than the airborne noise coming from the street. Impact noise is vibration that travels directly through the building’s structure—the floor joists, concrete slab, and wall studs. A simple rug, while it might muffle the sound of a dropped object slightly, does almost nothing to stop the low-frequency “thud” of footsteps because the vibration bypasses the rug and goes straight into the structure.
Effectively tackling impact noise without major construction requires a two-pronged strategy: decoupling and damping. Decoupling means physically isolating your furniture from the vibrating floor. Damping involves adding mass to large surfaces (like walls) to absorb and deaden the vibrations. You can’t change your neighbor’s floor, but you can change how your own apartment receives and amplifies the vibrations. Placing heavy, dense rubber pads or specialized sorbothane hemispheres under the legs of your bed frame, sofa, and shelving units can create a crucial break in the vibration path.

Strategically placed furniture can also act as a powerful damping tool. A large, heavy bookcase, filled to capacity with books and placed against a shared wall, adds significant mass that can help deaden structural vibrations. This is not about blocking sound in the air; it’s about stabilizing a vibrating surface. Layering a thick rug with a dedicated soundproof underlayment can add to this effect, but it’s the combination of decoupling and mass that yields real results.
Case Study: The NYC Prewar Apartment Challenge
In hundreds of NYC prewar buildings, New York Soundproofing found that footstep noise travels almost exclusively through the building’s structure. Their renter-friendly solution focuses on decoupling and mass. By placing dense rubber pads under all furniture legs and positioning heavy, filled bookcases against shared walls, they interrupt the vibration path. In one case, a client reported a 40% reduction in perceived footstep noise using only these strategic furniture placement and decoupling techniques, with no permanent alterations to the apartment.
Ultimately, a rug alone is a band-aid on a structural problem. A comprehensive approach that decouples your environment from the building’s frame is the only effective non-construction method.
The construction glue mistake that ruins your deposit when removing acoustic foam
For renters, the fear of losing a security deposit often prevents any meaningful attempt at soundproofing. The biggest and most common mistake is using permanent adhesives, like construction glue or strong spray adhesives, to mount acoustic panels. When it’s time to move out, removing these panels inevitably tears off paint and chunks of drywall, leading to costly repairs and a forfeited deposit. The key to successful and stress-free renter soundproofing is to embrace reversible architecture—solutions that are effective but entirely non-destructive.
Forget the glue. Modern mounting techniques borrowed from museums and galleries allow you to hang even heavy acoustic treatments without leaving a trace. High-quality removable adhesive strips (like 3M Command Strips) are perfect for lightweight foam or fabric panels. For heavier items, like a DIY acoustic panel built on a wood frame, consider installing a French cleat or a picture rail. These require only a few small, easily patched screw holes and allow you to hang and rearrange heavy objects with ease. Freestanding solutions are even better: room dividers on casters, or tension-mounted poles that wedge between the floor and ceiling, can support acoustic blankets or panels without touching the walls at all.
The goal is to make your acoustic solutions look like intentional, high-end design choices rather than temporary fixes. This mindset transforms a compromise into a feature.
We installed gorgeous wood slat panels with felt backing from Hausvita in our son’s former room. They’re completely removable, look like high-end architectural details, and actually worked in quieting the room. The key is embracing impermanence as luxury—like Japanese shoji screens and byōbu folding screens. Our clients love that these acoustic solutions look intentional, not like a renter’s compromise.
– Emily Henderson, Style by Emily Henderson
By adopting a “do no harm” approach from the outset, you can confidently invest in creating a quieter space, knowing that you can take your solutions with you—and your deposit—when you leave.
Smartphone or dedicated recorder: Which device ensures audio clarity for 50 years?
When you begin your acoustic triage, the first impulse is to grab your smartphone and use a decibel meter app. This is a great first step for gathering relative data. Apps like ‘Decibel X’ or ‘Sound Meter’ are invaluable for comparing the noise level at your window versus your door, or for seeing if a temporary fix has made a noticeable difference. They empower you to be a detective in your own space. However, it’s crucial to understand their limitations.
A smartphone’s microphone is not calibrated for professional acoustic measurement. It cannot give you an absolute, scientifically accurate decibel reading. The number on the screen is a good indicator, but it’s not evidence you could use in a dispute with a landlord, for example. The goal of professional acoustic testing is to ensure specific, healthy sound levels, while professional standards aim for 24-26 dB(A) in bedrooms. A smartphone can’t reliably confirm if you’re meeting this target. So, when should you use a smartphone versus something more dedicated?
For the purpose of DIY soundproofing in a rental, a smartphone is perfectly sufficient. Your goal is not long-term archival clarity but immediate, actionable intelligence. You want to answer questions like: “Is the noise worse in the morning or evening?” and “Did adding weatherstripping reduce the reading by 5 dB?” For this, a smartphone is the ideal tool. A dedicated recorder only becomes necessary in situations requiring legal documentation or professional-grade analysis, which falls outside the scope of non-structural apartment fixes. An interesting middle ground is using binaural microphones with your phone. These simple earbud-style mics can create a 3D audio recording, allowing you to walk through your apartment and later, with headphones, pinpoint the exact direction and nature of sound leaks with startling clarity.
Don’t get bogged down by the need for perfect data. Use your smartphone as a powerful diagnostic tool to identify patterns and measure relative improvement. It provides more than enough clarity to guide your soundproofing strategy effectively.
How to separate work and sleep zones in a studio without building walls?
In a studio apartment, the lack of physical separation means that the sounds of work—keyboard clicks, notification chimes, video calls—can easily bleed into your relaxation and sleep space. This acoustic crossover contributes to stress and makes it difficult for your brain to switch off. While you can’t build a wall, you can create powerful psychological and acoustic zones using a strategy of material and sensory contrasts.
The principle is simple: define your work zone with hard, acoustically reflective surfaces, and your sleep zone with soft, absorptive ones. A work area might feature a glass or metal desk, minimalist shelving, and bright, cool-toned lighting. These hard surfaces keep the space feeling alert and energetic, and they reflect sound in a way that is fine for a work context. In contrast, the sleep zone should be an oasis of absorption. Use a thick, high-pile rug, heavy curtains, felt wall panels, or even a plush upholstered headboard. Add layers of soft textiles like wool blankets and velvet cushions. This combination of materials will physically absorb sound, creating a demonstrably quieter, more cocoon-like environment. The lighting should be warm and indirect, further signaling to your brain that this is a space for rest.
Physical dividers, even if they aren’t solid walls, can be surprisingly effective. A tall, densely packed bookcase placed perpendicular to a wall can create a significant sound barrier. Open-backed shelving can be even more versatile; you can line the back with acoustic felt or fill the cubes with a mix of books and soft, decorative storage boxes. Even tall plants like a Fiddle Leaf Fig can create “sound shadows,” subtly disrupting the path of sound waves while adding a biophilic element of calm. As one tenant in a 400 sq ft studio noted, simply moving a full bookshelf to create a divider and using different textures in each zone allowed their brain to “automatically shift modes” when moving between the spaces.
By curating two distinct material palettes, you are creating separate acoustic environments. This deliberate zoning is a form of reversible architecture that can dramatically improve the livability and tranquility of a small, open-plan home.
Key takeaways
- True sound blocking requires mass and density, not just soft, absorptive materials like foam.
- Identify and seal all air gaps (vents, window seals) before investing in any soundproofing products.
- Use different strategies for different noises: mass for airborne traffic noise, and decoupling for structural impact noise like footsteps.
How to Arrange a 400 Sq Ft Apartment to Reduce Daily Stress Levels?
Living in a small apartment in a noisy city presents a dual challenge: managing external noise and internal clutter, both of which elevate stress. A successful arrangement of a 400 sq ft space is not just about aesthetics; it’s an exercise in sensory management. The goal is to create an environment that minimizes both sonic and visual chaos, allowing your nervous system to relax. This goes beyond simply blocking noise to actively curating a peaceful interior landscape.
Once you’ve addressed the major sound leaks using the principles of mass and sealing, there will inevitably be some residual noise. This is where sound masking, or biophilic soundscaping, comes in. Introduce positive, natural sounds to gently mask the intrusive urban hum. A small tabletop water fountain can cover the unpredictable sounds of traffic with a consistent, soothing trickle. Placing plants with delicate leaves, like bamboo or aspen, near a window or vent can create a gentle rustling that distracts from less pleasant noises. This strategy shifts the acoustic environment from one defined by stress-inducing noise to one defined by calming, natural sounds.
Visual overstimulation is another major source of stress in small spaces. Arrange your furniture to create deliberate breaks in sight lines. Even if it’s one room, you shouldn’t be able to see every corner from a single vantage point. Use a tall plant, a lightweight folding screen, or a hanging chair with a fabric canopy to create a “sensory deprivation nook”—a small, semi-enclosed space where you can retreat from both visual and sonic input. By combining acoustic management with thoughtful spatial organization, you transform your small apartment from a source of stress into a genuine sanctuary, proving that tranquility is not about the size of your space, but the quality of the environment you cultivate within it.
Start today by taking the first step: walk through your apartment and perform your own acoustic triage. Identifying your primary noise problem is the most crucial action you can take toward creating a more peaceful home.
Frequently Asked Questions About How to Soundproof Your Apartment Against Street Noise Without Major Construction?
Can smartphone apps accurately measure apartment noise levels?
Apps like ‘Decibel X’ (iOS) and ‘Sound Meter’ (Android) provide good relative noise level indicators but aren’t professional-grade. They’re useful for comparing before/after soundproofing results and identifying noise patterns throughout the day.
What’s the advantage of using binaural recording for acoustic assessment?
Binaural recording with simple earbud microphones lets you walk through your apartment and identify exact sound leak points when listening back with headphones, turning technical measurement into a spatial awareness exercise.
How can I document soundproofing progress artistically?
Create spectrogram photography by using frequency analysis apps to visualize sound patterns before and after treatment. These abstract visuals can become personalized wall art while proving your acoustic investment’s ROI.