Cloudy varnish on dark paint is a predictable chemical failure, not bad luck, caused by microscopic surface and atmospheric imbalances.
- The “sinking in” of oil into dark, porous pigments creates an uneven surface that scatters light, appearing as matte, dull patches.
- Humidity above 55% during varnishing traps microscopic water droplets, causing a foggy “bloom” effect as the varnish cures.
Recommendation: Control your environment meticulously and choose a modern, synthetic varnish with proven chemical stability to guarantee clarity and protect your work’s integrity.
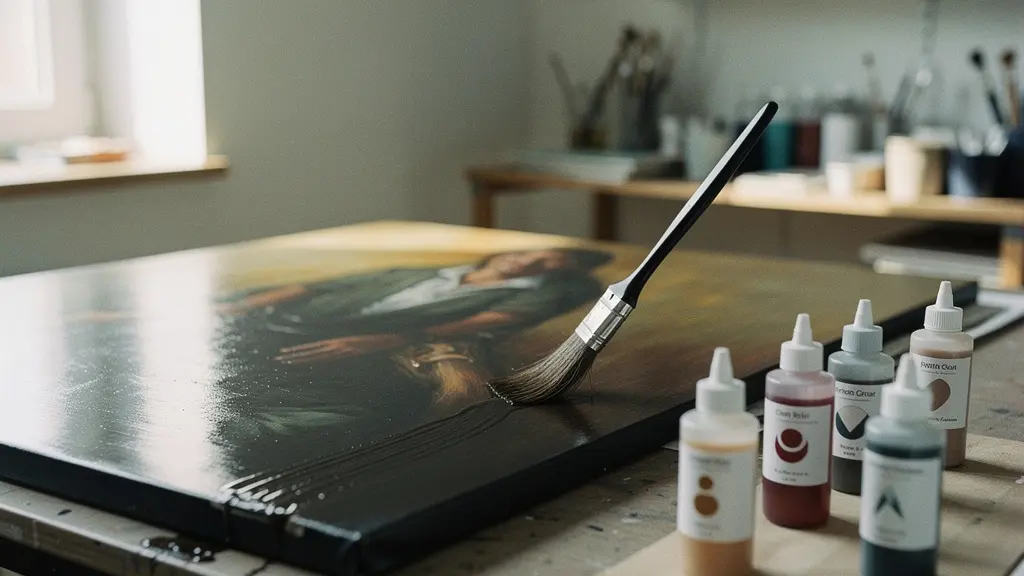
You have spent months on a painting, carefully building layers of rich, deep color. The shadows hold the mood, the darks provide the structure. The final step is to apply a protective varnish. You hold your breath as you brush on the clear liquid, expecting it to unify the surface and saturate the colors. Instead, a disaster unfolds: your deep, transparent shadows turn into a milky, hazy mess. The clarity is gone, replaced by a dull, cloudy film.
This frustrating experience is common for intermediate oil painters. The conventional advice is often a simple list of rules: wait six months, use a good varnish, apply thin coats. Yet, even when following these guidelines, clouding can occur. This is because the problem is not just about procedure; it’s about chemistry and physics. The interaction between oil paint, pigments, and the environment is a delicate balance. Understanding the underlying science is the only way to truly control the outcome.
This guide moves beyond the platitudes to provide a conservator’s perspective. We will dissect the chemical reasons for dullness and clouding, particularly in dark passages. We will explore why the “dryness” of an oil painting is more complex than a simple timeline and how the choice of varnish is a critical decision for the long-term life of your artwork. The goal is to replace anxiety and guesswork with precise knowledge, empowering you to protect and present your work with confidence.
For those who prefer a visual demonstration of proper technique, the following video offers a practical look at applying modern picture varnishes to achieve a perfect, non-cloudy finish.
To navigate this deep dive into the science of varnishing, the article is structured to address each critical factor in sequence. The following table of contents outlines the path from understanding the problem to mastering the solution, ensuring your darks remain as deep and clear as you intended.
Summary: A Conservator’s Guide to Avoiding Cloudiness in Oil Painting Varnish
- Why do dark oil colors turn dull and matte as they dry?
- How to clean a 6-month-old painting without damaging the paint film?
- Damar or Synthetic: Which varnish is less likely to yellow over 20 years?
- The humidity mistake that traps moisture under the varnish and causes fogging
- When is an oil painting truly dry: Why waiting 6 months is non-negotiable?
- Why trying to paint “perfectly” blocks your ability to release true emotion?
- The structural maintenance mistake that ruins stone facades within 10 years
- How to Use Abstract Painting to Express Emotions That Words Cannot Capture?
Why do dark oil colors turn dull and matte as they dry?
The phenomenon of dark colors losing their depth and becoming dull as they dry is known as “sinking in.” This is not a defect in the paint but a physical property related to the pigment and its oil binder. To understand this, one must view the paint film not as a solid sheet, but as a microscopic structure of pigment particles suspended in a matrix of polymerized oil. Different pigments have vastly different physical characteristics and require varying amounts of oil to achieve a workable paste.
Dark pigments, particularly umbers, siennas, and carbon blacks, are often highly porous and have a large surface area. Consequently, they require a higher ratio of oil binder to wet every particle. As the oil paint cures through oxidation, this excess oil can be drawn from the surface down into the lower paint layers or the ground, especially if the ground is absorbent. This leaves the pigment particles at the very surface under-bound, creating a microporous and uneven surface.
This microscopic roughness is the direct cause of the dull, matte appearance. A glossy surface reflects light coherently, like a mirror, making colors appear deep and saturated. A matte surface, however, scatters light in all directions. This light-scattering effect is perceived by the eye as a loss of saturation and a chalky or greyish cast, which is dramatically more noticeable on dark colors where the contrast is highest. Indeed, research from Gamblin Colors shows that earth colors and blacks, requiring more oil, are prime candidates for developing these variations in surface quality.
How to clean a 6-month-old painting without damaging the paint film?
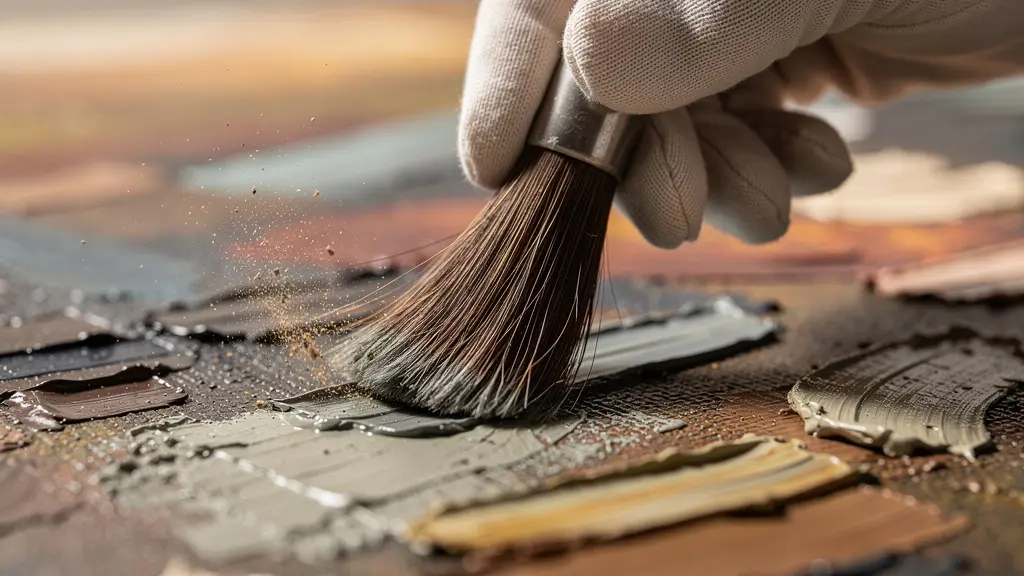
Before any varnish can be applied, the surface of the painting must be impeccably clean. Over a six-month drying period, a painting can accumulate a surprising amount of household dust, studio debris, and airborne particles. Applying varnish over this grime will permanently embed it in the artwork, creating imperfections and potentially compromising the varnish layer itself. However, a six-month-old paint film, while touch-dry, is not fully cured and is still vulnerable to mechanical and chemical damage.
The cleaning process must therefore be gentle and precise, a task that requires a conservator’s careful touch. Aggressive rubbing or the use of harsh solvents can abrade the delicate surface or even lift incompletely cured paint. The goal is to remove surface dust without disturbing the paint film. A soft, natural-hair brush, like a badger or goat hair blender, is the primary tool for this task. Compressed air can be used with extreme caution, held at a distance and angle to avoid driving particles into the paint.
For more stubborn particles or a light surface film, a slightly more involved method may be necessary, but solvent use should be minimal. The following steps outline a safe protocol for cleaning a semi-cured oil painting surface:
- First, always test the paint film’s stability. On an inconspicuous edge, gently rub a cotton swab lightly dampened with a mild, odorless mineral spirit like Gamsol or Sansodor. If any color transfers to the swab, the paint is not ready for any solvent-based cleaning.
- If the test shows no color lift, you can proceed. Begin by gently dusting the entire surface with a soft badger brush to remove loose particles.
- For any remaining grime, lightly dampen a lint-free cloth with the mild mineral spirit. The cloth should be damp, not wet.
- Working in small, methodical sections, gently wipe the surface. Apply minimal pressure and frequently switch to a clean part of the cloth to avoid redepositing dirt.
- Finally, allow the surface to dry completely for at least a few hours before proceeding with any varnishing. This ensures all residual solvent has evaporated.
Damar or Synthetic: Which varnish is less likely to yellow over 20 years?
The choice of varnish is one of the most critical long-term decisions an artist makes for their work. The varnish must not only saturate the colors and unify the surface sheen, but it must also be chemically stable and, most importantly, removable. For decades, the standard was Damar, a natural resin from trees in Southeast Asia. It provides a beautiful, high-gloss finish. However, its long-term performance is notoriously poor. Damar resin is inherently unstable and will significantly yellow and become brittle with age, altering the painting’s appearance and making future conservation difficult.
In the late 20th century, a concerted effort in the conservation science community sought a better alternative. As pioneering research chemist René de la Rie and artist Robert Gamblin explain, this collaboration led to a breakthrough. They state:
The research that came out of the National Gallery identified the most stable resin, Regalrez 1094, to be used as a picture varnish.
– Robert Gamblin and Rene de la Rie, National Gallery of Art Research Collaboration
This research ushered in the era of modern synthetic varnishes. These varnishes, based on low molecular weight resins like Regalrez 1094, are chemically engineered for optical purity and stability. They are often formulated with Hindered Amine Light Stabilizers (HALS) and UV Absorbers (UVA) that protect both the varnish and the underlying paint from the damaging effects of ultraviolet light. Their primary advantage is their resistance to yellowing and their easy, predictable removability with mild solvents, a core principle of modern art conservation.
The differences in long-term performance between traditional and modern varnishes are stark, as this comparative analysis shows.
| Property | Damar Varnish | Synthetic (Gamvar/Regalrez) |
|---|---|---|
| Yellowing over 20 years | Significant yellowing | Minimal to none |
| Removability | Difficult with age | Easy with mild solvents |
| UV Resistance | Poor | Excellent with HALS |
| Bloom tendency | High in humidity | Very low |
The humidity mistake that traps moisture under the varnish and causes fogging
Even with a perfectly clean, dry painting and the best synthetic varnish, a flawless finish can be ruined by one invisible factor: atmospheric humidity. The clouding effect, or “bloom,” that appears as a milky or bluish haze in the varnish layer is often the direct result of applying varnish in an environment with excessive moisture in the air. This is a purely chemical phenomenon related to condensation and solvent evaporation.
When varnish is applied, its solvent component begins to evaporate. This evaporation process has a cooling effect on the surface of the varnish film. If the surrounding air is humid, this localized cooling can cause the temperature of the varnish surface to drop below the dew point of the air. When this happens, microscopic water droplets condense from the air directly onto the curing varnish. These water droplets become trapped within the varnish film, disrupting its structure and creating a cloudy emulsion instead of a clear, homogenous layer.
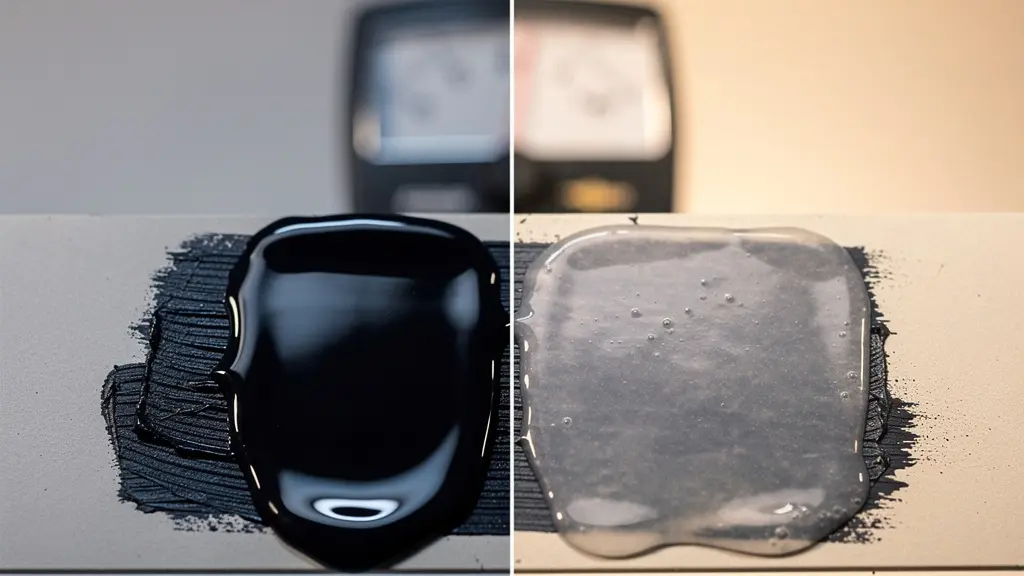
This effect, known as hygroscopic bloom, is particularly disastrous on dark colors where the lack of transparency is most obvious. The solution is prevention through strict environmental control. Varnishing should never be done on a rainy day or in a damp basement. The ideal environment is a room with stable temperature and humidity. To achieve this, professional conservators recommend maintaining a 45-55% relative humidity. Using a dehumidifier and a simple hygrometer to monitor the room’s conditions is a small investment that can save a painting from being ruined at the final stage.
When is an oil painting truly dry: Why waiting 6 months is non-negotiable?
The most frequently cited rule in oil painting is to wait at least six months before varnishing. For many frustrated artists, this feels like an arbitrary and overly cautious delay. This impatience, however, stems from a misunderstanding of how oil paint “dries.” Unlike watercolors, which dry through simple evaporation, oil paint cures through a complex chemical process called oxidation. The oil binder (typically linseed oil) reacts with oxygen from the air, causing the molecules to link together, or polymerize, forming a durable, solid film.
This polymerization process is incredibly slow and happens from the outside in. A painting might feel touch-dry in a few days or weeks, but the layers underneath are still soft and actively consuming oxygen. Applying a varnish layer too soon effectively suffocates the paint film. It creates an impermeable barrier that cuts off the oxygen supply, halting the polymerization process. The trapped, uncured oil and solvents can lead to a host of structural problems, including cracking, wrinkling, and a persistent tackiness.
The six-month guideline is an average based on a painting of moderate thickness. The actual curing time can vary dramatically based on several factors. The type of pigment used is a major variable; technical studies demonstrate that earth colors like Burnt Umber, which contain manganese, are fast driers, while colors like Ivory Black or Alizarin Crimson can remain “wet” for much longer. The thickness of the paint application is the most critical factor; thick impasto can take years, or even decades, to fully cure in its deepest layers. Therefore, the six-month rule should be seen as an absolute minimum for thin-to-medium paint films, not a universal guarantee.
Why trying to paint “perfectly” blocks your ability to release true emotion?
The technical pursuit of a “perfect” finish—flawlessly smooth, uniformly glossy, and free of any imperfection—can become an obsession that overshadows the artistic intent of the work. This anxiety about achieving a flawless surface mirrors a deeper fear in the creative process: the fear of imperfection itself. When an artist is overly focused on technical perfection, the logical, controlling part of the brain takes over, often suppressing the intuitive, emotional impulses that give art its power and authenticity.
The varnish layer, as the final presentation of the work, is often the focal point of this anxiety. A cloudy bloom or a sunken-in dark passage can feel like a personal failure. However, from another perspective, surface variations can be embraced as part of the work’s character. In contemporary art, many artists deliberately reject the traditional high-gloss, “perfect” finish. They choose matte or satin varnishes, or even leave sections unvarnished, to enhance the physicality of the paint and the raw, direct quality of their mark-making. A matte surface can make a paint layer feel more direct and visceral, while a gloss surface creates depth and distance.
By understanding the science behind varnishing, the artist can be liberated from the anxiety of it. When you know *why* sinking-in occurs or *how* humidity causes bloom, you move from being a victim of unpredictable phenomena to an informed practitioner making deliberate choices. This knowledge allows you to control the finish when you need to, but also gives you the confidence to embrace or even manipulate “imperfections” for expressive effect. True mastery is not just about achieving a perfect finish, but about having the freedom to choose the right finish for the emotional content of the work, even if that finish is intentionally imperfect.
The structural maintenance mistake that ruins stone facades within 10 years
In the world of architectural conservation, a parallel exists that provides a powerful cautionary tale for painters. A common mistake in maintaining historic stone facades is the application of modern, impermeable sealants. Promoted as a way to “protect” the stone from water, these sealants form a plastic-like film on the surface. While they do prevent water from getting in, they also prevent the moisture that is naturally present within the stone and mortar from getting out. The result is a structural catastrophe.
Trapped moisture builds up behind the sealant, and through freeze-thaw cycles, it exerts immense pressure, causing the stone surface to delaminate and spall. The “protective” coating ends up destroying the very thing it was meant to preserve, often within a single decade. This costly mistake highlights a fundamental principle of conservation, whether for a building or a painting: reversibility and breathability. Any protective layer added to a historic object should not permanently alter it and should be removable without damaging the original.
This is precisely analogous to applying a permanent, non-removable varnish to an oil painting, or varnishing a painting before it is fully cured. The varnish acts like the impermeable stone sealant. If applied too early, it traps solvents and uncured oil, leading to cracking and delamination as the underlying paint film continues to shift and shrink. Conservation data indicates that varnish applied to undried paint can lead to cracking within the first year. The only professionally responsible approach is to use a varnish that is chemically designed to be removed, allowing future conservators to safely clean and re-varnish the work as needed. This ensures the long-term structural integrity of the artwork.
Your Conservation Checklist: The Principle of Reversibility
- Commit to removable varnishes: Only use modern synthetic varnishes (like those based on Regalrez 1094) specifically designed for fine art that can be safely removed with mild solvents.
- Avoid all-purpose products: Never use hardware store polyurethane, acrylic mediums, or any permanent architectural varnish on a painting. Their removal would require solvents that would destroy the paint.
- Document your materials: Always make a note of the varnish type and the date of application on the back of the painting. This information is invaluable for future conservation.
- est before you act: If removing an old varnish, always test the solvent on a small, inconspicuous area first to ensure it will not harm the underlying paint layer.
- Consult a professional when in doubt: For valuable or sentimental works, especially those with existing condition issues, seeking the advice of a professional art conservator is the wisest choice.
T
Key Takeaways
- Sinking-in is Physics: Dull patches in darks are caused by oil-absorbent pigments creating a rough, light-scattering surface, not a chemical flaw in the paint.
- Curing is Chemistry: Oil paint dries by slow oxidation (polymerization). Varnishing before the 6-12 month minimum suffocates the paint, causing long-term structural damage.
- Environment is Everything: Applying varnish in humidity above 55% causes microscopic water condensation, resulting in a permanent cloudy “bloom” in the varnish layer.
How to Use Abstract Painting to Express Emotions That Words Cannot Capture?
While the previous sections have focused on the protective and technical aspects of varnish, its role is not purely functional. The final finish is also a powerful aesthetic tool that can profoundly alter the emotional impact of a painting, particularly in abstract art where color, texture, and light are the primary carriers of meaning. The choice between a gloss, satin, or matte finish is a final, crucial brushstroke that can either amplify or mute the work’s emotional voice.
A gloss varnish acts like a lens of water over pebbles. It dramatically increases the saturation and depth of colors, making darks appear almost infinitely deep and blacks truly black. This creates a sense of drama, intensity, and richness. For an abstract work intended to convey deep, powerful emotions, a gloss surface can enhance that feeling of sublimity and intensity. It creates a formal distance, presenting the painting as a precious, luminous object.
Conversely, a matte varnish absorbs light, reducing surface glare and minimizing tonal contrast. It can slightly lighten the darkest values. While this might seem undesirable, it can be used to great effect. A matte surface creates a sense of intimacy, quietness, and rawness. It emphasizes the physical texture and “skin” of the paint, making the artwork feel more direct, tactile, and vulnerable. For an abstract piece about quiet introspection or raw, unfiltered feeling, a matte finish can be the more emotionally resonant choice. A satin finish, sitting between the two extremes, offers a compromise, unifying the surface without the dramatic effects of either gloss or matte, often used to achieve a quiet, contemporary feel.
Frequently Asked Questions About Varnishing and Artistic Expression
How does varnish choice affect the emotional reading of an abstract painting?
The finish directly controls how light interacts with your colors, which is a primary emotional driver. Gloss varnish deepens colors and creates drama and intensity. Satin provides a calm balance and unifies the surface quietly. Matte varnish creates a sense of intimacy, softness, and raw, unfiltered texture.
Can I use different varnish finishes on different areas?
Yes, this is an advanced technique called selective varnishing. Applying matte varnish to some areas and gloss to others can create dynamic visual tension, guide the viewer’s eye through the composition, and add a subtle layer of complexity to the surface. It allows you to control which elements recede and which come forward.
Should dark emotional passages always be varnished with gloss?
Not necessarily. While gloss varnish will make darks deeper and more dramatic, a matte varnish on a dark passage can create a very different but equally powerful emotional effect. A matte black can feel like a void, an abyss that absorbs all light and emotion, which may be more fitting for certain expressive goals than a reflective, glossy black.